Saturday 17 September 2022

Launching RHEL 8 Cloud Image on Libvirt

Launching RHEL 8 Cloud Image on Libvirt

Bring the speed of provisioning from pre-built cloud images to your Libvirt/KVM hypervisor.

Go here: https://access.redhat.com/downloads/content/479/ver=/rhel—8/8.6/x86_64/product-software and download Red Hat Enterprise Linux 8.6 KVM Guest Image. It is 794MB.

Execute the following and you will be prompted for a password to turn into a SHA512 password hash, if you want to use passwords instead of an SSH key.

python -c 'import crypt,getpass; print(crypt.crypt(getpass.getpass(), crypt.mksalt(crypt.METHOD_SHA512)))'

Create a cloud-init Configuration YAML file. The first line must start with “#cloud-config”.

vim config.yaml

(Note that the default user “cloud-user” and SSH password authentication is disabled in the example below.)

#cloud-config  
#password: 1800redhat
#chpasswd: { expire: False }  
ssh_pwauth: False  
hostname: rhel86.the.lab  
#package_upgrade: true  
users:  
- name: spud
groups: wheel  
lock_passwd: false  
passwd: <password_hash>  
shell: /bin/bash  
sudo: ['ALL=(ALL) NOPASSWD:ALL']  
ssh-authorized-keys:  
- <ssh_public_key>

Build the cloud-init ISO image. At the time of writing there is no official cloud-utils package for RHEL 8 so recommend borrowing/installing from Fedora 36 if you are using RHEL 8.

dnf install https://download-ib01.fedoraproject.org/pub/fedora/linux/releases/36/Everything/x86_64/os/Packages/c/cloud-utils-0.31-10.fc36.noarch.rpm

dnf install cloud-utils
# OR the above URL for RHEL 8.

cloud-localds config.iso config.yaml

Clone the RHEL 8 cloud image to create a disk for your VM. Move/copy the ISO as well to a storage location libvirtd can access:

sudo install --owner qemu --group qemu --mode 0600 rhel-8.0-x86_64-kvm.qcow2 /var/lib/libvirt/images/rhel86-vm1.qcow2
sudo install --owner qemu --group qemu --mode 0400 config.iso /var/lib/libvirt/images/rhel86-vm1.iso

Provision the VM.

virt-install --memory 4096 --vcpus 1 --name rhel8-vm1 --disk /var/lib/libvirt/images/rhel86-vm1.qcow2,device=disk --disk /var/lib/libvirt/images/rhel86-vm1.iso,device=cdrom --os-type Linux --os-variant rhel8.6 --virt-type kvm --graphics none --import --network bridge=virbr0 --memballoon driver.iommu=on --rng /dev/random,driver.iommu=on

virt-install automatically attaches to the serial console of the VM so you can see it booting. To exit the console use <Ctrl>+<]>, just like telnet from the olden days.

Login with the user and password combination: cloud-user / 1800redhat

Red Hat Enterprise Linux 8.6 (Ootpa) 
Kernel 4.18.0-372.9.1.el8.x86_64 on an x86_64 

Activate the web console with: systemctl enable --now cockpit.socket 
localhost login: cloud-user 
Password: 
Last login: Fri Sep 16 20:21:18 on ttyS0 

# Switch to root, enable cockpit and determine the ip address of the VM, (eg. 192.168.122.227) 

[cloud-user@localhost ~]$ sudo -i 
[root@localhost ~]# systemctl enable --now cockpit.socket 
Created symlink /etc/systemd/system/sockets.target.wants/cockpit.socket → /usr/lib/systemd/system/cockpit.socket. 
[root@localhost ~]# ip a show eth0 
2: eth0: <BROADCAST,MULTICAST,UP,LOWER_UP> mtu 1500 qdisc fq_codel state UP group default qlen 1000 
    link/ether 52:54:00:a2:60:ee brd ff:ff:ff:ff:ff:ff 
    inet 192.168.122.227/24 brd 192.168.122.255 scope global dynamic noprefixroute eth0 
       valid_lft 2771sec preferred_lft 2771sec 
    inet6 fe80::e2bd:c725:232b:fd0e/64 scope link noprefixroute
       valid_lft forever preferred_lft forever 

In a web browser on your laptop go to: https://<ipaddress>:9090/
In the example above the IP address is on the “inet” line and is 192.168.122.227 (leave out the “/24” which signifies the netmask and is not part of the IP address)

Login again with: cloud-user / 1800redhat

To exit that text console that “virt-install” put you into press the keys <Ctrl>+<]>

You can ssh to the VM using: ssh cloud-user@<ip_address>

Change the VM’s hostname if necessary:
hostnamctl set-hostname <new_hostname>

Shutdown the VM to commence resizing the disk to something bigger than the default 10GB.
shutdown now

On your hypervisor enlarge the virtual disk. The example below makes the disk 150GB:
qemu-img resize /var/lib/libvirt/images/rhel86-vm1.qcow2 150G

Start the VM:
virsh start rhel8-vm1

At this stage cockpit does not have the storage plugin installed so CLI it is:

$ ssh cloud-user@192.168.122.227
[cloud-user@localhost ~]$ lsblk
NAME   MAJ:MIN RM   SIZE RO TYPE MOUNTPOINT
sr0     11:0    1   366K  0 rom  
vda    252:0    0   150G  0 disk 
├─vda1 252:1    0     1M  0 part 
├─vda2 252:2    0   100M  0 part /boot/efi
└─vda3 252:3    0 149.9G  0 part /
[cloud-user@localhost ~]$ df -h
Filesystem      Size  Used Avail Use% Mounted on
devtmpfs        7.7G     0  7.7G   0% /dev
tmpfs           7.8G     0  7.8G   0% /dev/shm
tmpfs           7.8G   17M  7.7G   1% /run
tmpfs           7.8G     0  7.8G   0% /sys/fs/cgroup
/dev/vda3       150G  3.0G  147G   2% /
/dev/vda2       100M  5.8M   95M   6% /boot/efi
tmpfs           1.6G     0  1.6G   0% /run/user/1000

Note that cloud-init automatically resized the partition /dev/vda3 and root / filesystem to use all of the new storage automatically on boot.

Written with StackEdit.
Sunday 26 September 2021

Building a Storj Node on CentOS

--- ---

Building a Storj Node on CentOS

Be the decentralized cloud. Contribute your own storage node. https://www.storj.io/node

Storj is an S3-compatible platform and suite of decentralized applications that allows you to store data in a secure and decentralized manner. The more bandwidth and the more storage your make available, the more you get paid.

The Linux install uses a Docker Container. I and others appear to fail to simply replace Docker with Podman. For my first successful attempt I went with CentOS with a view to move to Podman and finally RHEL 8 Podman. This guide documents my first successful attempt and uses CentOS with Docker.

References:

Requirements

https://docs.storj.io/node/before-you-begin/prerequisites

  • Storage:
    • / 8GB
    • /home 552GB (500GB + 10% overhead) {Storej} + user files
  • CPU: 1
  • RAM: 2GB
  • OS: CentOS 8 Server - minimal install

Procedure

I am going to recommend a different order for setup to make it more streamline / linear in process. Skip creating an “Identity” until after Docker is installed and the unprivileged user (eg. storj) has been created.

Setup all the Things Outside the Storj Node

Get setup with an identity at STORJ: https://www.storj.io/host-a-node
The fourth step is installing the “CLI”. It will help you cover off the prerequisites. Reminder that depending on your firewall you might need to define both:

  1. NAT / Port Forward and
  2. Firewall rule to allow the port forward, doh!

Docker Installation

Pick you Linux Distro https://docs.storj.io/node/setup/cli/docker
Or go straight to the Docker CentOS instrucitons: https://docs.docker.com/engine/install/centos/

yum update
reboot
yum remove docker docker-client docker-client-latest docker-common docker-latest docker-latest-logrotate docker-logrotate docker-engine
yum install -y yum-utils
yum-config-manager --add-repo https://download.docker.com/linux/centos/docker-ce.repo
yum install docker-ce docker-ce-cli containerd.io
systemctl start docker
docker run hello-world

groupadd docker
systemctl enable docker.service
systemctl enable containerd.service
cat >> /etc/docker/daemon.json <EOT
{
  "log-driver": "local",
  "log-opts": {
    "max-size": "10m"
  }
}
EOT

firewall-cmd --add-port 28967/udp --add-port 28967/tcp
firewall-cmd --add-port 28967/udp --add-port 28967/tcp --permanent
sysctl -w net.core.rmem_max=2500000
echo "net.core.rmem_max=2500000" >> /etc/sysctl.conf

Create an Unprivilleged Account for the Node Software

useradd -m -G docker storj
su - storj
# Check Docker works.
docker run hello-world

Create a Storj Identity

https://docs.storj.io/node/dependencies/identity

Install Storj Node Software

docker pull storjlabs/storagenode:latest
mkdir /home/storj/storj_node_disk
docker run --rm -e SETUP="true" \
    --mount type=bind,source="/home/storj/.local/share/storj/identity/storagenode",destination=/app/identity \
    --mount type=bind,source="/home/storj/storj_node_disk",destination=/app/config \
    --name storagenode storjlabs/storagenode:latest

First Time Start

docker run -d --restart unless-stopped --stop-timeout 300 \
-p 28967:28967/tcp -p 28967:28967/udp -p 127.0.0.1:14002:14002 \
-e WALLET="0x0000000000000000000000000000000000000000" \
-e EMAIL="your@email.com" \
-e ADDRESS="<Internet_fqdn>:28967" \
-e STORAGE="500GB" \
--mount type=bind,source="/home/storj/.local/share/storj/identity/storagenode",destination=/app/identity \
--mount type=bind,source="/home/storj/storj_node_disk",destination=/app/config \
--name storagenode storjlabs/storagenode:latest

Common Commands

docker logs storagenode
docker stop -t 300 storagenode
docker start storagenode

Dashboards

CLI

docker exec -it storagenode /app/dashboard.sh

Web
The command above that started the Storj software limited the Web UI to localhost. For the paranoid, establish an SSH tunnel that port forwards to 14002 on the storj host. This will probably mean enabling SSH port forwarding and restarting SSH.

ssh -L 127.0.0.1:14002:127.0.0.1:14002 root@<storj_host>

Web browse to http://127.0.0.1:14002/

Written with StackEdit.

Sunday 26 April 2020

Tiny Rsyslog Container Service

Using buildah we can create tiny containers.  Consider a RHEL 7 Rsyslog central logging service in a 164MB container, without doing crazy unsupported stuff.

Why?  Because containers should be:
  • tiny, minimal attack service and resource friendly;
  • easy to rebuild, infrastructure as code;
Environments disconnected from the Internet present challenges to mirror and maintain updated base container images.  The "From Scratch" style of container images means those environments can leverage existing YUM repositories to build and rebuild up-to-date images.

Below is a Bash shell script to build the Rsyslog container for you.  The script includes instructions on how to test and clean up the containers and images afterwards.  It also includes two different sets of "run" commands that:
  • leaves the collected logs inside the container, not very useful but simple.
  • exposes the collected logs through a volume which bind mounts between the container and its host.

#!/bin/bash

# Prerequisits:
#   * RHEL 7 server or similar.  Tested with RHEL 7 Server.
#   * buildah package to build the image.
#   * podman package to test the image.
#   * Run this script as the root user.

# Install the required software on RHEL 7 host.
# ---------------------------------------------
# subscription-manager repos --enable=rhel-7-server-rpms --enable=rhel-7-server-extras-rpms --enable=rhel-7-server-optional-rpms
# yum install buildah podman

# Author: spuddidit
# Date:  24/4/2020

# Default values for arguments.
imageName='spud_rsyslog'
port=5140


Usage () {
  echo "Usage:  $0 [ -h ] [ -n IMAGE_NAME ] [ -p PORT ]"
  echo "Options:"
  echo -e "\t-h\t\tDisplay this help message."
  echo -e "\t-n IMAGE_NAME\tContainer Image name. (Default: $imageName)"
  echo -e "\t-p PORT\t\tPort rsyslog will listen for TCP & UDP. (Default: $port)"
  echo ""
  exit 1
}


# if [ $# -eq 0 ]; then
#   Usage
# fi

while getopts "hn:p:" opt; do
  case ${opt} in
    h )
      Usage
      ;;
    n )
      imageName=$OPTARG
      ;;
    p )
      port=$OPTARG
      ;;
    \? )
      echo "Invalid option: $OPTARG" 1>&2
      ;;
    : )
      echo "Invalid option: $OPTARG requires an argument" 1>&2
      ;;
  esac
done
shift $((OPTIND -1))


echo 'Create a "from scratch" image.'
container=$(buildah from scratch)
echo 'Mount "from scratch" image.'
scratchmnt=$(buildah mount $container)

echo 'Install the packages:'
#echo -e '\tredhat-release'
echo -e '\trsyslog'
#yum install -y --releasever=7 --installroot=$scratchmnt redhat-release
# install_weak_deps option is not supported in RHEL 7???
# --setopt install_weak_deps=false
yum install -y --quiet --releasever=7 --setopt=reposdir=/etc/yum.repos.d \
            --installroot=$scratchmnt --setopt=cachedir=/var/cache/yum \
            --setopt=override_install_langs=en --setopt=tsflags=nodocs \
            rsyslog #redhat-release

echo 'Configure rsyslog service to receive logs from other hosts.'
cat >$scratchmnt/etc/rsyslog.conf <<EOT
\$ModLoad imudp
\$UDPServerRun ${port}

# Provides TCP syslog reception
\$ModLoad imtcp
\$InputTCPServerRun ${port}


\$template RemoteLogs,"/var/log/remote/%fromhost%_%fromhost-ip%_%PROGRAMNAME%.log"
*.* ?RemoteLogs
& ~
EOT


# :source, !isequal, "localhost" -?RemoteLogs
# :source, isequal, "last" ~


echo 'Cleanup inside the container.'
yum clean all -y --installroot $scratchmnt --releasever 7


echo 'Set the start command.'
buildah config --cmd "/usr/sbin/rsyslogd -n" $container
echo "Set listeners on UDP & TCP ports:  ${port}"
buildah config --port ${port}/tcp $container
buildah config --port ${port}/udp $container
echo "Create an image from the build container."
buildah commit --rm $container ${imageName}:latest

echo -e '\nList all images and highlight the new one.'
echo      '------------------------------------------'
podman images | grep --color -e "${imageName}" -e '^'
echo ''

image_id=$(podman images --quiet --filter reference=$imageName)
cat <<EOT
## Start the Logger Container *without* a Volume

    container=\$(podman run -p 5140:5140 -p 5140:5140/udp -d --name spud-syslog $image_id)

## --OR--  Start the Logger Container *with* a Volume

    container=\$(podman run --volume remote_logs:/var/log/remote -p 5140:5140 -p 5140:5140/udp -d --name spud-syslog $image_id)
    logger_dir=\$(podman inspect \$container | grep remote_logs | grep Source | cut -d\" -f4)


## Send a Message to the Containerised System Logger

    logger -n 127.0.0.1 -P 5140 "andrew was here 2."

## ... *without* a volume - Attach to a Container with a Shell and look at logs.

    podman exec -it --latest /bin/bash
    find /var/log/remote -type f -exec cat {} \;
    exit

## ... -OR - *with* a volume - access the logs from the container host.
    find \$logger_dir -type f -ls


## Cleanup
    podman stop --latest
    podman rm --latest
    podman rmi $image_id

EOT


Sunday 30 June 2019

ManageIQ Container on RHEL 7

The ManageIQ quick start provides instructions for using docker including the docker service. On RHEL 7 and 8 podman is the way to go for working with containers. For reference here is the original documentation I have adapted this guide from: http://manageiq.org/docs/get-started/docker

Get the RHEL 7 software for working with containers:

subscription-manager repos --enable=rhel-7-server-rpms --enable=rhel-7-server-extras-rpms --enable=rhel-7-server-optional-rpms
yum install podman

Download the ManageIQ container:

podman pull manageiq/manageiq:hammer-7

Start ManageIQ mapping port external port 8443 to the internal secure web server:

podman run -d -p 8443:443 manageiq/manageiq:hammer-7
firewall-cmd --add-port 8443/tcp

Connect to the ManageIQ Web UI:

firefox https://<container_host>:8443/

Written with StackEdit.

Monday 6 May 2019

Building a RHEL Repo Container

Sonario: you want to go off grid AND network install packages from a known release?
Solution: Move the packages from RHEL ISO images and any other packages you require into a containerised web server.

This is a bit of forced use case with many many other great solutions but we are building custom images from scratch without the internet and I thought putting the repo server into a container would be a simple from scratch tutorial which readers can quickly adapt to their own thing. Better than hello world?

Configure Repositories

This example is based on RHEL 7.6 so I register and attach a subscription before we get down to business.

subscription-manager register
subscription-manager attach --pool <pool_id>

Repos for Container-ing

subscription-manager repos --enable=rhel-7-server-rpms --enable=rhel-7-server-extras-rpms --enable=rhel-7-server-optional-rpms

Building a From Scratch Container

yum install buildah runc podman
container_spud=$(buildah from scratch)
scratchmnt=$(buildah mount $container_spud)
rpm --root $scratchmnt --initdb
yum install yum-utils
yumdownloader --destdir=/tmp redhat-release-server
rpm --root $scratchmnt -ihv /tmp/redhat-release-server*.rpm

Add Web Server with Static Content

yum install -y --installroot=$scratchmnt httpd
rm $scratchmnt/var/www/html/index.html
mkdir /mnt/rhel_installation
mount -oro,loop rhel-server-7.6-x86_64-dvd.iso /mnt/rhel_installation
mkdir -p $scratchmnt/var/www/html/rpm_repos/rhel-server-7.6-x86_64-dvd
cp -av  /mnt/rhel_installation $scratchmnt/var/www/html/rpm_repos/rhel-server-7.6-x86_64-dvd

Create more directories and use the createrepo command from the createrepo package to turn a directory of RPMs into a proper YUM repository.

createrepo <directory>

Turn the buildah container into image for sharing and deployment.

buildah config --cmd "/usr/sbin/httpd -DFOREGROUND" $container_spud
buildah config --port 80/tcp $container_spud
buildah commit $container_spud spud_content_server:latest
podman images

Launch the RHEL Content Container.

podman run -p 8080:80 -d --name httpd-server <image_id>

Web browse to: http://<container_host>:8080/rpm_repos/rhel-server-7.6-x86_64-dvd/

RHEL hosts wanting to use the repository need a repo file in /etc/yum.repos.d/ similar to the following:

[RHEL76InstallMedia]  
name=Red Hat Enterprise Linux 7.6  
baseurl = http://<container_host>:8080/rpm_repos/rhel-server-7.6-x86_64-dvd/
metadata_expire=-1  
gpgcheck=0  

Written with StackEdit.

System Monitoring with PCP (Performance Co-pilot)

Configure Repositories

This example is based on RHEL 7.6 so I register and attach a subscription before we get down to business.

subscription-manager register
subscription-manager attach --pool <pool_id>

Install and Start Monitoring

The monitoring services start automatically upon installation but have them start at each boot you have to enable their services.

yum install pcp-zeroconf
systemctl enable pmcd pmlogger

Live Text Based Monitoring

Command Description
pcp atop Similar to “top”.
pcp atopsar Similar to “sar”.
pmrep -i eth0 -v network.interface.out Network outbound.

Live Web Based Monitoring

yum install pcp-webapi pcp-webjs
firewall-cmd --add-port 44323/tcp --permanent
firewall-cmd --reload
systemctl enable pmwebd
systemctl start pmwebd

Web browse to: http://<host>:44323/
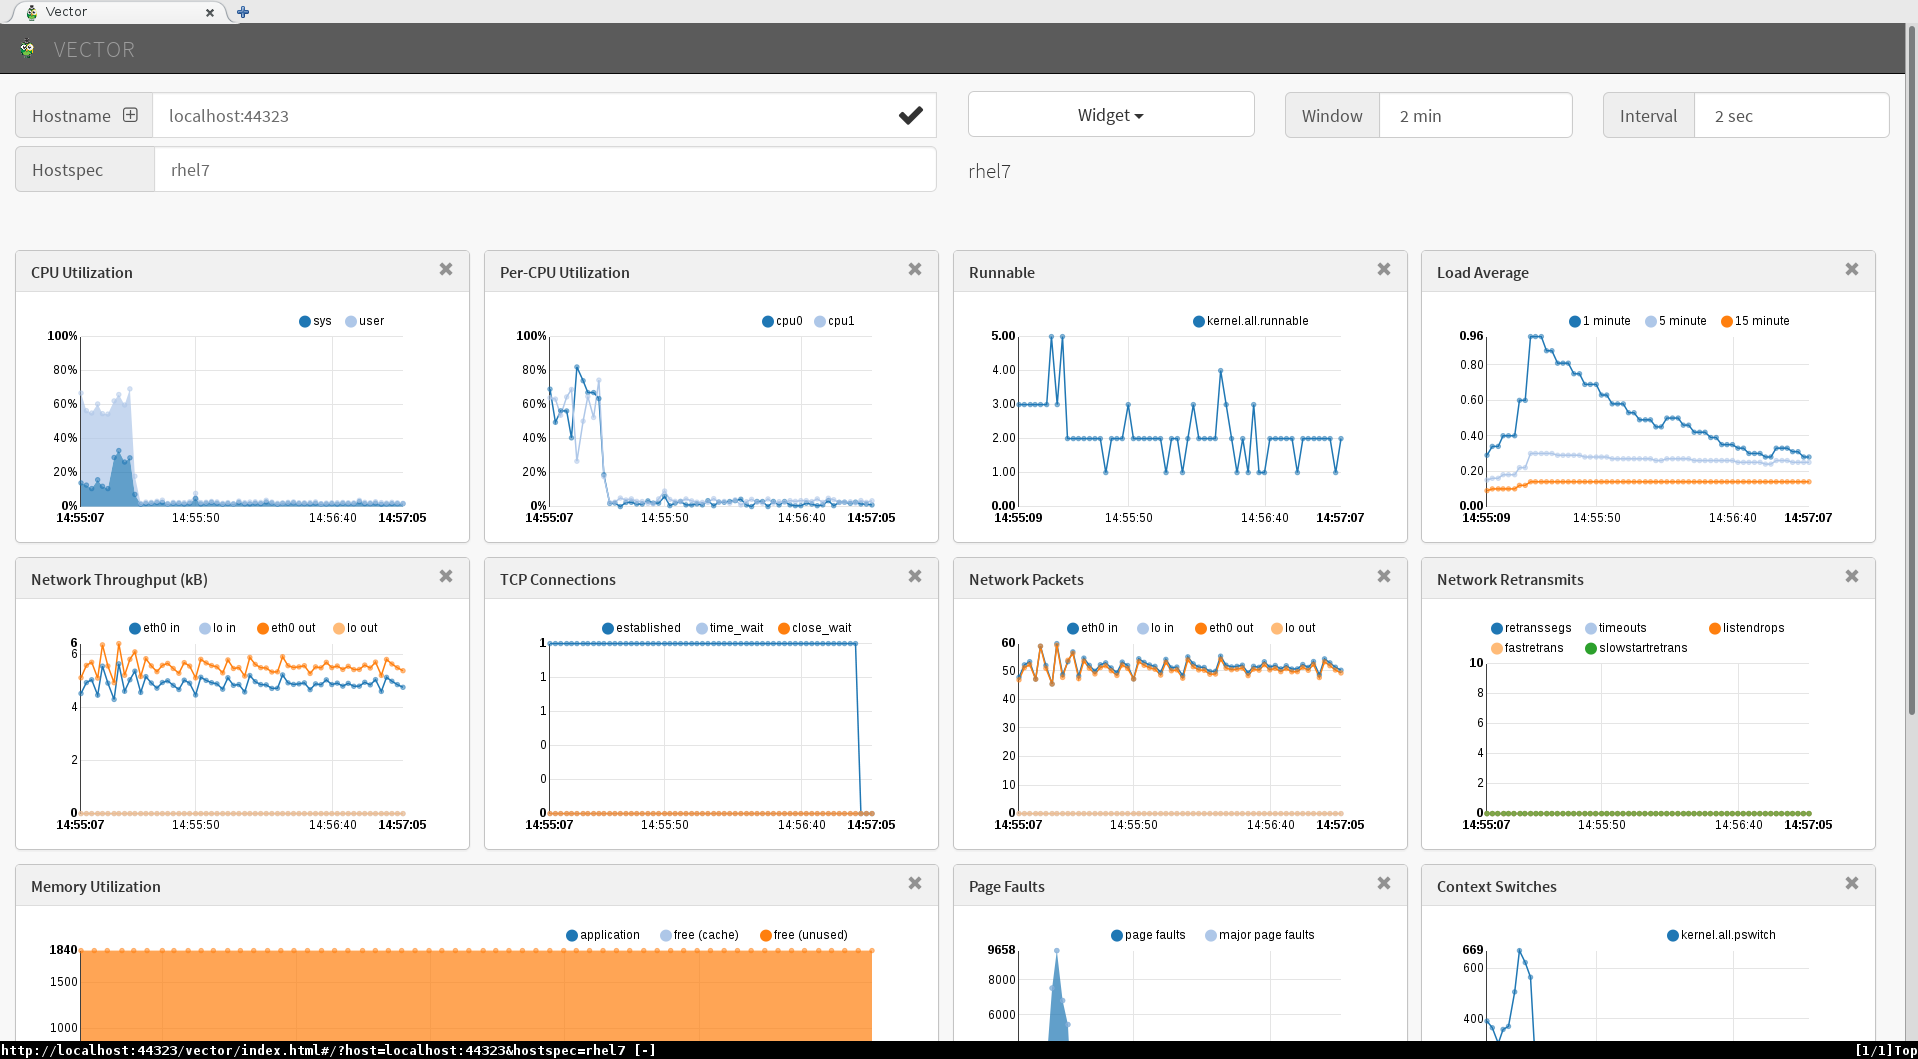
Explore the various web applications provided on the jump page. There are many and the following image shows “Vector”.
enter image description here

Copy logs for Later Analysis

Archive the PCP logs for attaching to your Red Hat support ticket.

tar cvJf pcp-logs_$(hostname)_$(date +%Y%m%d).tar.xz /var/log/pcp/

Written with StackEdit.

Sunday 10 March 2019

Satellite 6.3 to 6.4 Upgrade

References:

For each Organisation in Satellite refresh their manifests.

Check what issues exist before upgrading. I had a couple of thousand old tasks which it offered to cleared out for me. I quit when it found I had to upgrade Puppet first.

foreman-maintain upgrade list-versions
foreman-maintain upgrade check --target-version 6.4

Upgrade Puppet on Satellite

 subscription-manager repos --enable=rhel-7-server-satellite-6.3-puppet4-rpms
 satellite-installer --upgrade-puppet

Replace the “JAVA_ARGS” variable withthe following in /etc/sysconfig/puppetserver:

 JAVA_ARGS="-Xms2G -Xmx2G -XX:MaxPermSize=256m -Djava.io.tmpdir=_/var/tmp_"

Add the following line to /etc/foreman-installer/custom-hiera.yaml:

 puppet::server_jvm_extra_args: '-XX:MaxPermSize=256m -Djava.io.tmpdir=_/var/tmp_'

Restart the Puppet server:

 systemctl restart puppetserver

Go back and re-check with foreman-maintain:

 foreman-maintain upgrade check --target-version 6.4 --whitelist="disk-performance"

All good, lets upgrade:

  foreman-maintain upgrade run --target-version 6.4 --whitelist="disk-performance"

Confirm with “y” at the next two questions that you wish to continue. It is reminding you to make a backup and that the next phase is going to change stuff!

Optional, install the OpenSCAP content:

 foreman-rake foreman_openscap:bulk_upload:default

Post Upgrade Tasks

Review the taks in the upgrade guide:

I chose to only do the “Removing the Previous Version of the Satellite Tools Repository” task for now.


Written with StackEdit.